If you have ever heard or used Prezi, you would know that it is really famous for the smooth zoom in – zoom out transitions. These transitions were at first exclusive for Prezi users, until 2016, Microsoft decided to introduce a new feature that could be used to create transitions like Prezi’s navigation tools and amaze every PowerPoint user. That feature is the transition called Morph.
Morph is my all-time favorite feature, which I have already mentioned several times in my previous blog posts. You can use Morph to create smooth transitions between slides and also emphasize, navigate, zoom in, zoom out, object entrance, object exit, scroll, morph an object, animate words and et cetera. Morph’s power can be considered as “limitless”, it all depends on your flexibility and creativity! It is really easy to use, and does not take too much time either!
All in all, Morph is a great tool, but many people have not noticed its true power. That’s why I feel it is my responsibility to show you how it works, with all the tricks and tips that you can use to make a better presentation on your own. Let’s take a journey together to uncover the power of Morph!
1. How to create a Morph transition
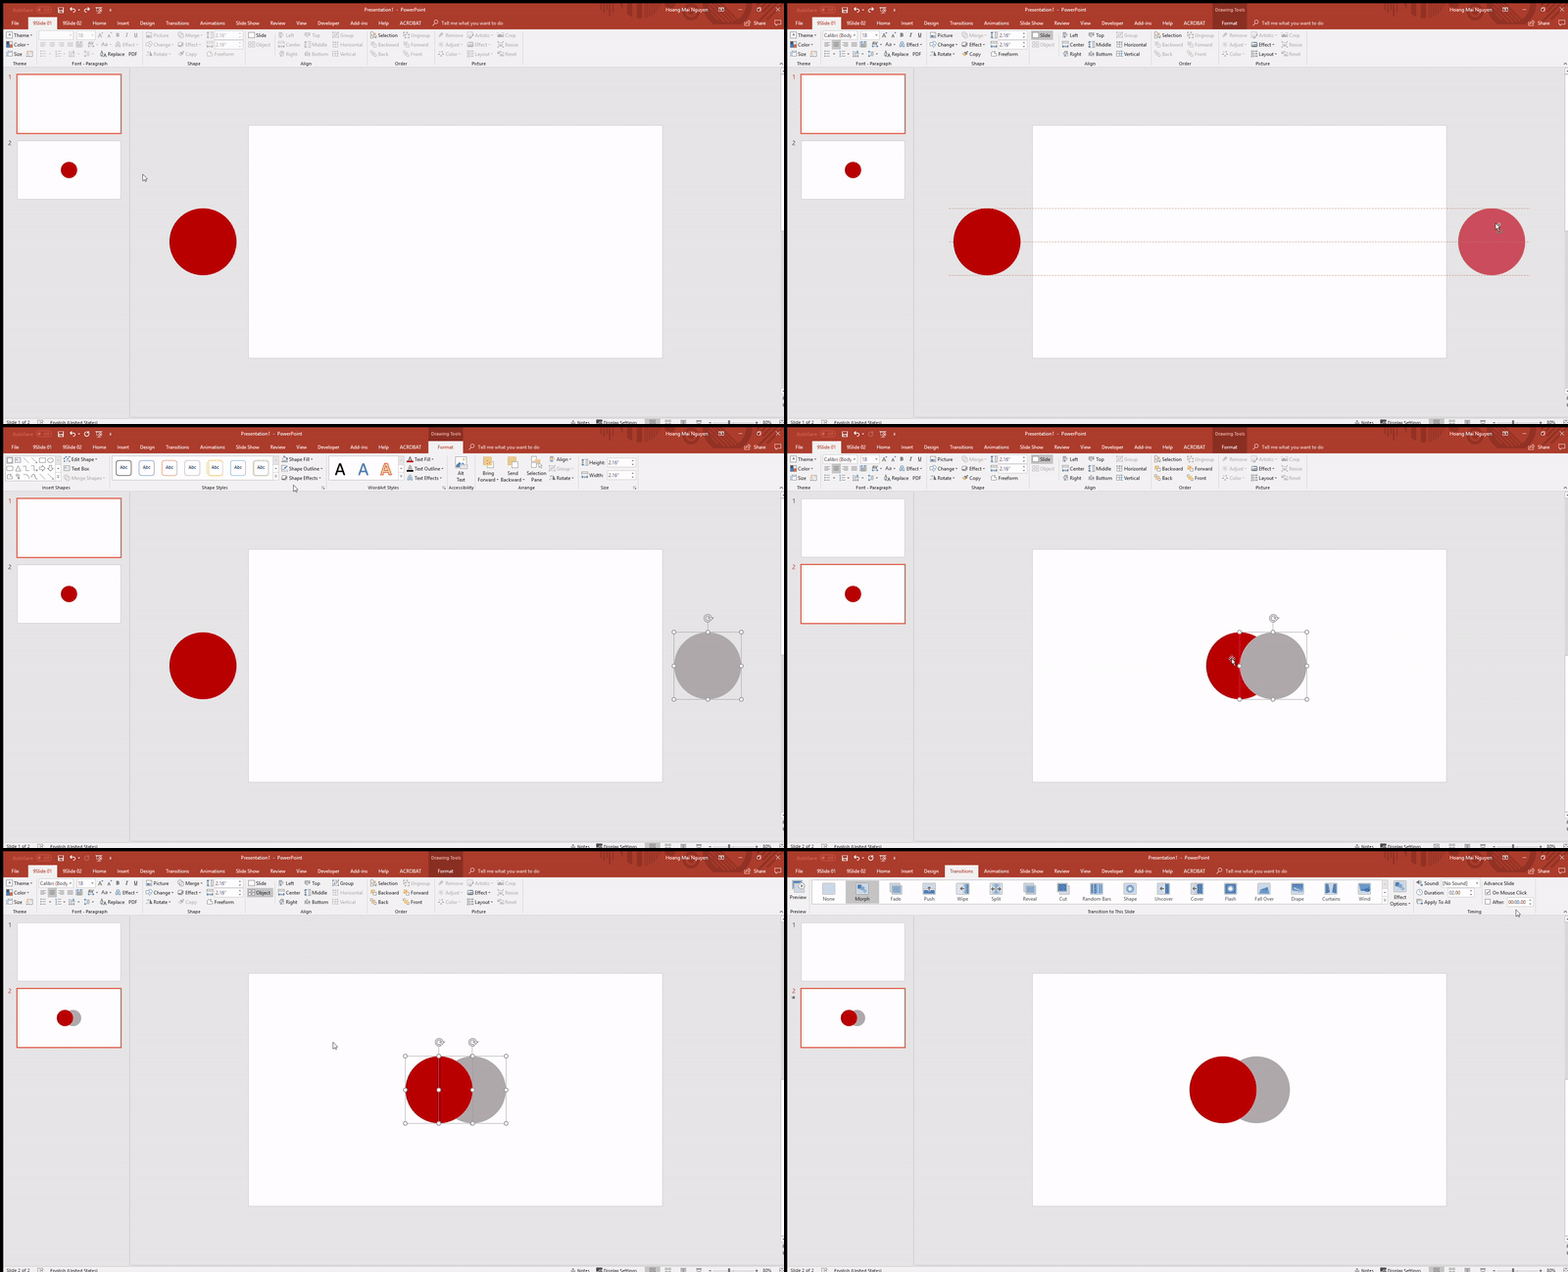
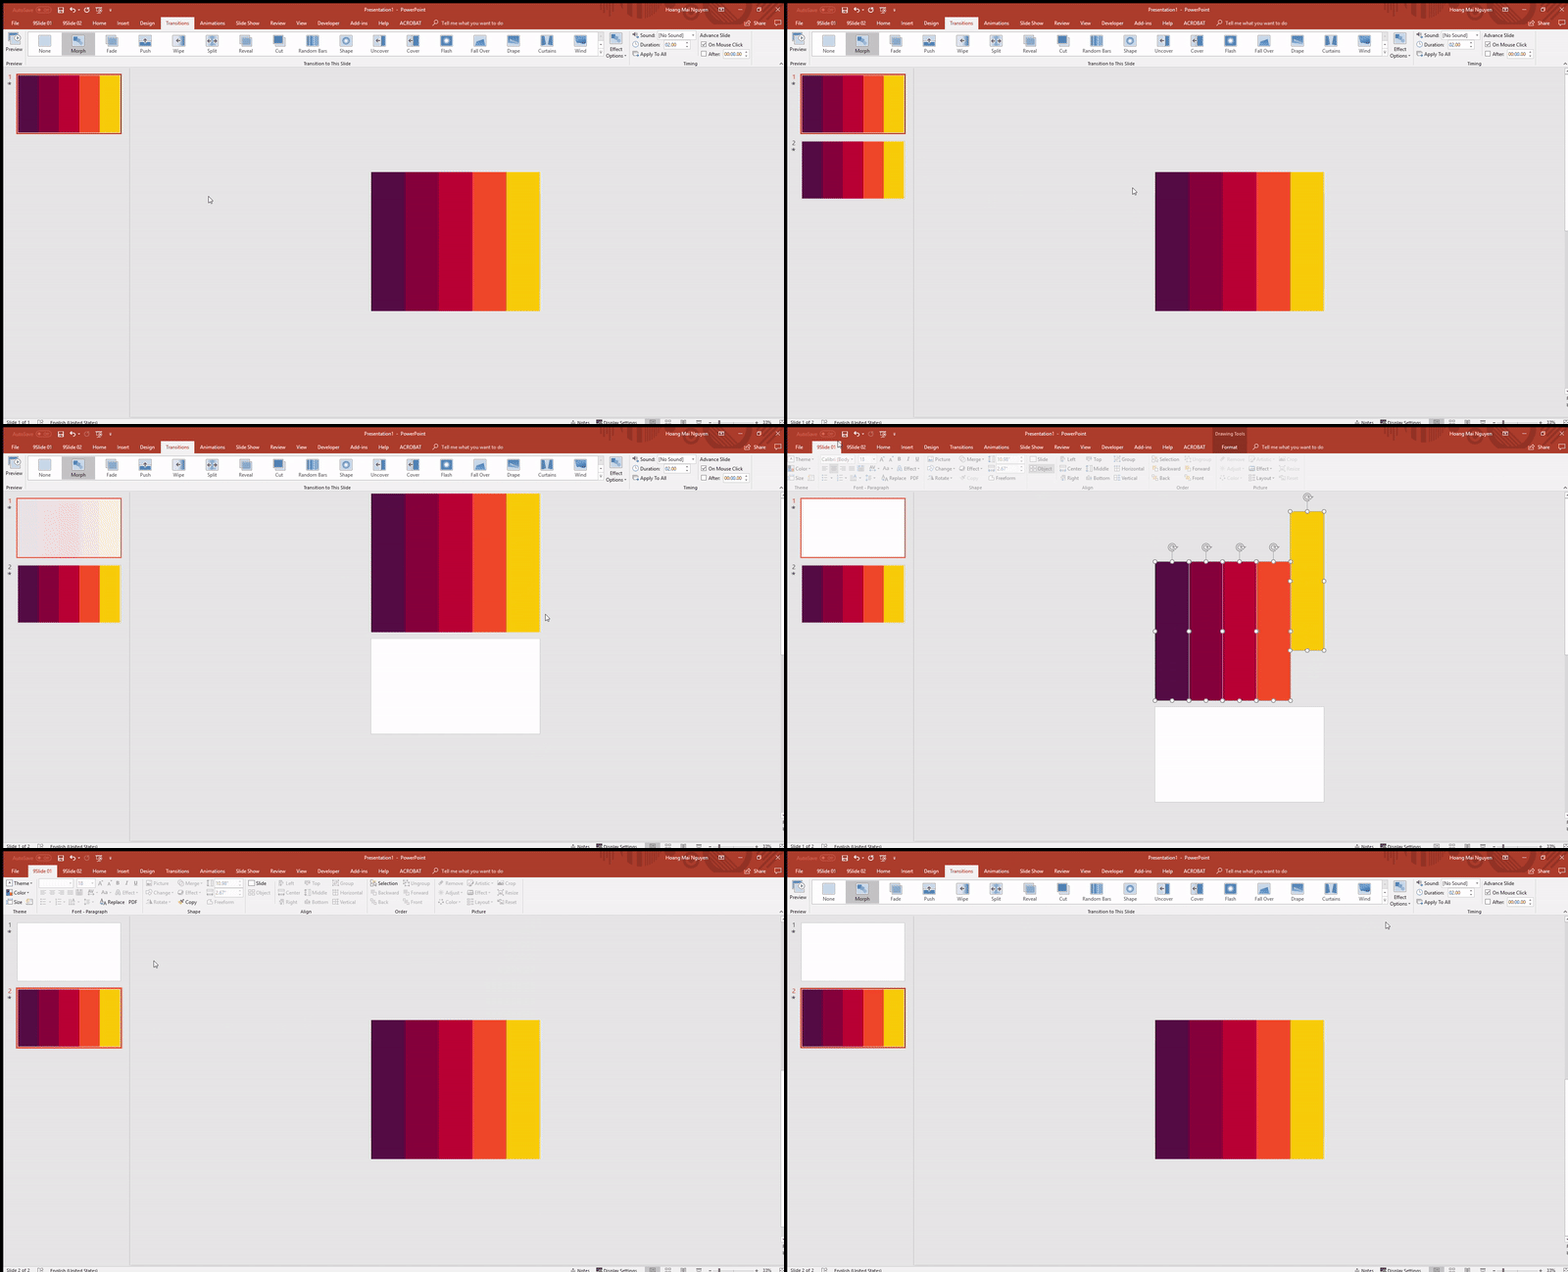
Like all other transitions, Morph only works when you have two slides. However, the difference is that you would need 2 slides with at least one common objects. Normally, to create these two slides, you would have two options:
- Create the 1st slide with all the objects you need, then duplicate it and make the changes to the objects on the 2nd
- Create the 1st slide with all the objects you need, then create the 2nd slide and copy + paste the objects you need from the 1st to the 2nd
After that, apply the transition to the 2nd slide by clicking at Transitions > choose Morph.
Now you can see all the changes you have made to the 2nd slide (either size, shape, position, style or rotation of the objects) become a smooth transition between 2 slides. Once again, remember that if you want to make the change to one object, that object needs to be in both of the slides. If you only have the object in one slide, Morph will create a fade entrance/exit effect for the object.
There are 3 different styles of Morph: Objects, Words and Characters.
Let’s take a look in each of the transition.
Morph transitions: Objects
If you apply this transition to the 2nd slide, PowerPoint will show you all the changes you have made to the objects on that slide. Since “objects” pretty much include everything (images, shapes, text, etc.), I use it most of the time to make the transition. It is also the default selection when you use Morph.
Morph transitions: Words
This is best used when you have a long paragraph and you want to separate and highlight only some words in the paragraph. You can apply this effect when you go to Transition > Morph, then in the Effect Options box on the right side, choose Words (it doesn’t show since it is a pop-up window).
Morph transitions: Characters
It is also a really interesting feature, though I don’t normally use it that much. It can create one, or several words out of a sentence/paragraph by changing the letters in the sentence/paragraph to the right position. You can apply this effect when you go to Transition > Morph, then in the Effect Options box on the right side, choose Characters (it doesn’t show since it is a pop-up window).
2. Tips and tricks of using Morph
Now you have understood the foundation of this awesome transition, let’s get to a bit higher level of it. I will try to include all the tips and tricks I normally use when using Morph, but if you have anything else to add, please do not hesitate to comment below! However, I have to separate these tips and tricks into 2 (or more) blog posts so that you would not get too overwhelmed with Morph’s power! 🙂
Let’s first start with some basic tips:
Using Morph to create an entrance and exit animation
Normally when I need to create entrance or exit animation for an object, I would use the Animation panel. However, you can also create the animations with the help of Morph. Morph can be used to replace Fly In/Fly Out and Fade animations as follows.
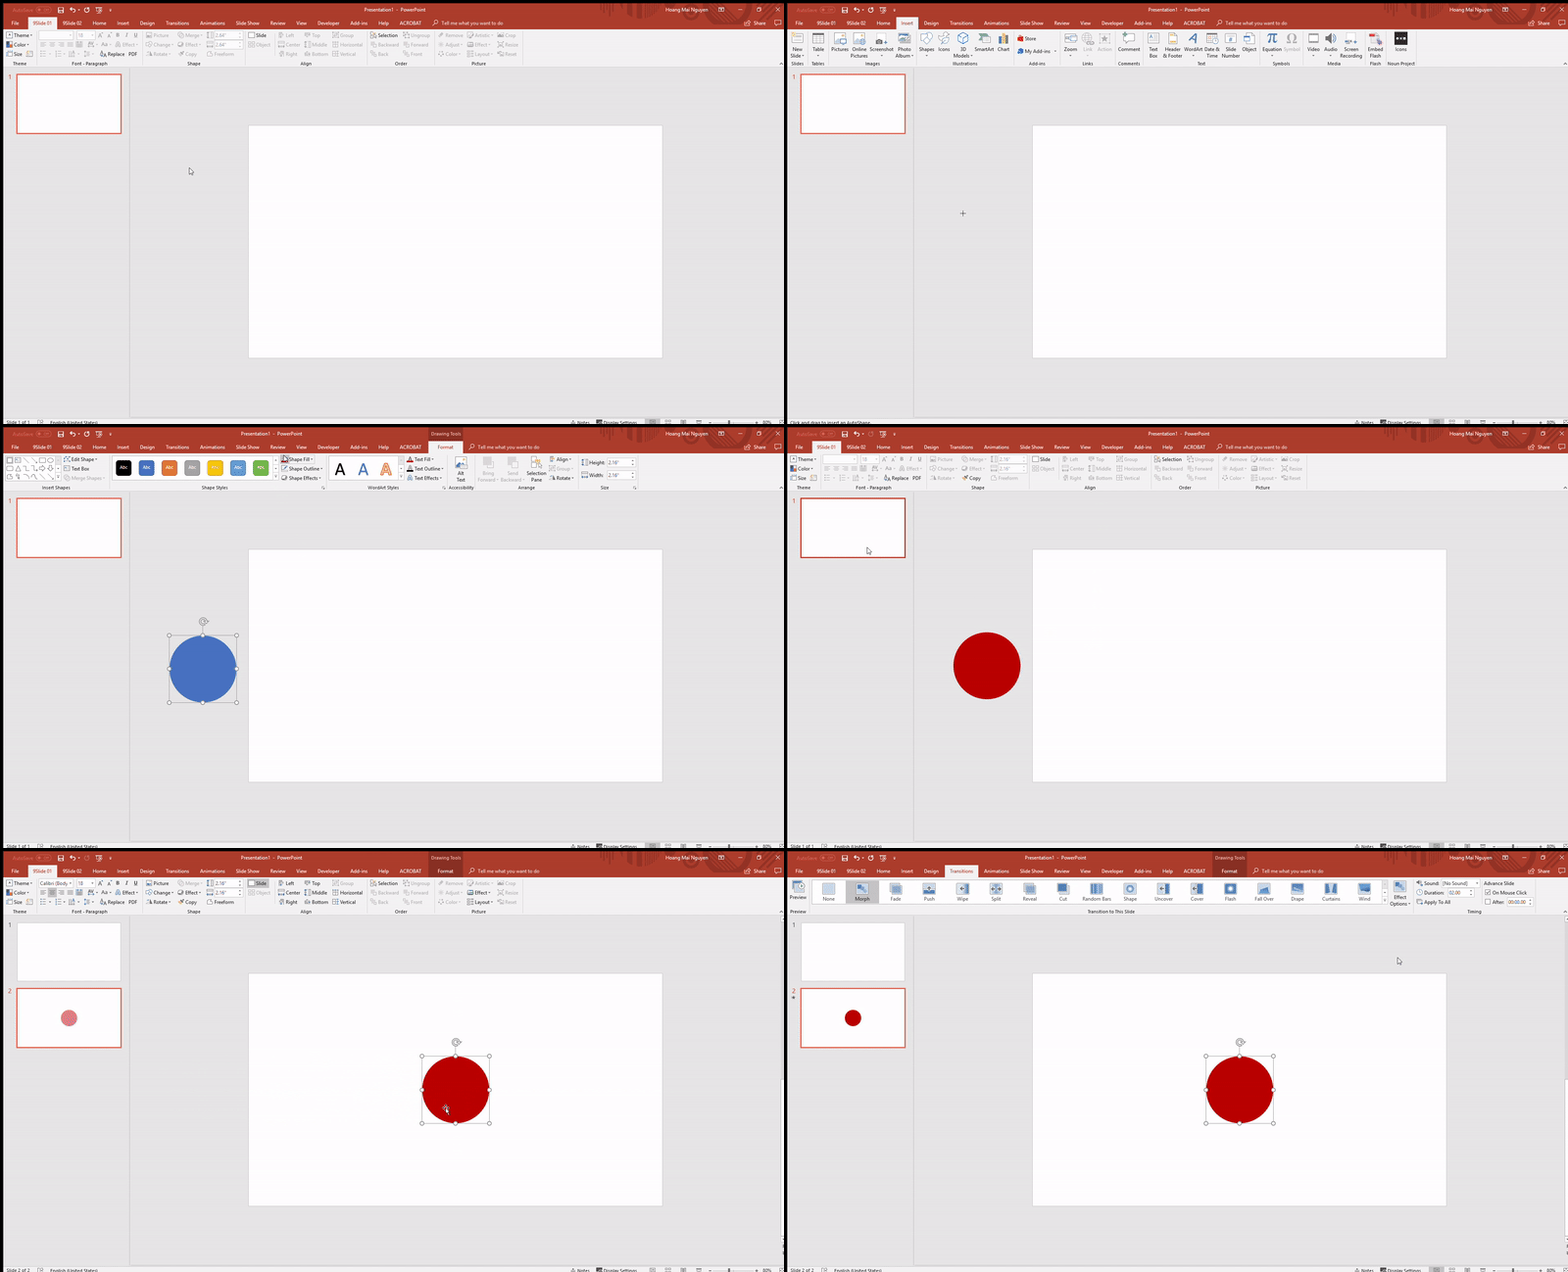
If you want to make a Fly In entrance animation to an object (A), follow these steps:
- Firstly, create a slide (1) with an object (A) and put it to the outer blank space (not the slide itself)
- Then duplicate the slide (1), you would have slide (2). Then move object (A) into the slide (2)
- Apply Morph to the slide (2)
That’s how you create a simple Fly In entrance animation for the object! Remember, if you have more than one object, you can still follow the steps and all the objects will fly in at once.
For the Fly Out exit animation, you can also follow those steps with a little twist:
- Firstly, create a slide (1) with an object (A) and leave it on the slide (1)
- Then duplicate the slide (1), you would have slide (2). Then move object (A) out of (2) to the outer part.
- Apply Morph to the slide (2)
You can do the same for many objects, and they would also fly out at once!
Tip: If you want to make an object appear before another, move it further to the slide so that it will take longer for the object to fly in, compare to the other objects that are placed closer to the slide.
In case of Fade entrance animation to an object (A), follow these steps:
- Create a slide (1) without an object (A)
- Create another slide (2) or duplicate slide (1), then insert the object (A)
- Apply Morph to slide (2)
You would see that the object slowly appears in the slide 2. Of course, it can be applied to many objects also.
If you want to make a Fade exit animation/object slowly disappears, follow the same steps but in reverse:
- Create a slide (1) with an object (A)
- Duplicate slide (1) to have slide (2), then delete object A
- Apply Morph to slide (2)
Using Morph to zoom in/zoom out
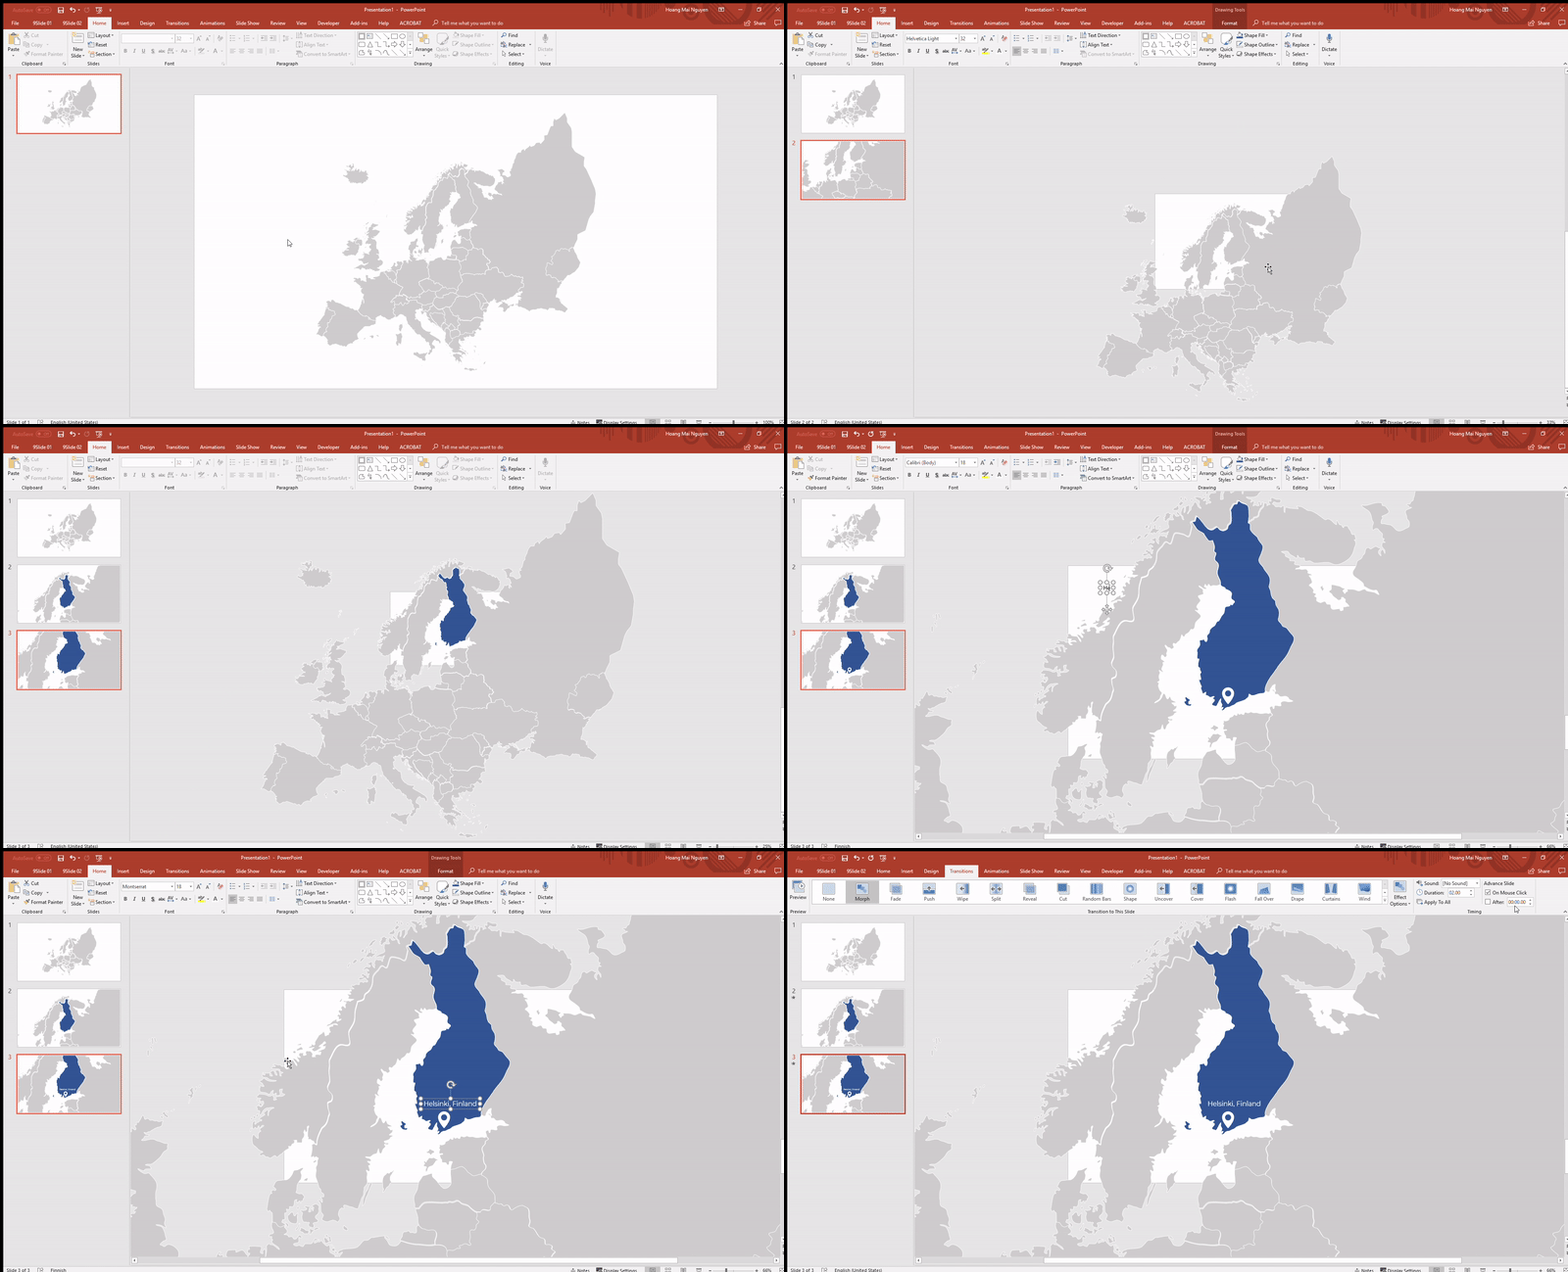
Let’s imagine this scenario where you need to present where is Helsinki on the European map. Usually, you would just show the map in one slide, and pinpoint the locations. However, with the help of Morph, the audience would be able to understand better about the locations of the cities, and your presentation would be more dynamic as well. Let’s follow these steps:
- First, create slide (1) with the map of Europe. I have a map with all the countries in PowerPoint freeform shapes, so I just paste it here. To understand vector and freeform shape in PowerPoint, you can check out this blog: How to use vector graphics in PowerPoint
- Then make all of the countries into a group: Select all object (Ctrl A) > Group (Ctrl G)
- Duplicate slide (1), now we have slide (2). Enlarge the map on slide (2) and move it to the suitable place, where Finland becomes the focus of the slide. Since I have all the countries as vectors, I could easily change the color of the shape of Finland to make it stand out better.
- Duplicate slide (2) again, now we have slide (3). Enlarge the map once again, then move Helsinki to the center of slide (3). I will insert an icon of the pinpoint to Helsinki to make it easier to see.
- Apply Morph to slide (2) and (3).
Now you would have a smooth transition: First showing the map of Europe, then the zoom in Finland, and finally showing where Helsinki is!
If you want to zoom out again to show the Europe map, do as follows:
- Duplicate slide (1) to get slide (1*). Now move slide (1*) below slide (3)
- Apply Morph to slide (1*)
Let’s take a look at the result:
Phew! These are just a few examples of what Morph could do. There are still many tips and tricks are coming, include:
- Use Morph to navigate
- Make a crop & scroll transition
- Morph a shape
- Use Morph for 3D objects
- Create an Anagram effect with Morph
However, they will need to wait until the next blog post to be featured.
How do you feel about the power of this tool? Are you still with me on this journey to understand the true power of Morph? If you are, please stay tuned and subscribed so that we could continue in the next blog post! 🙂
In the meantime, you can check out some other blog posts to understand more about PowerPoint:


